Page text
INTRODUCTION
APPLICATIONS / PRODUCTS
UL & OPL  DRAWINGS
ESTIMATING TABLES  /  TECH DATA
Saving Lives through innovation & education❘  Hilti Firestop Guide 2003–2004❘  1-800-879-8000❘  www.us.hilti.com
14
Product Information
 latest product information :
www.us.hilti.com
 ordering information see page:
30
CP 681
Tub Box Kit
Technical Data
Dimensions
10-3/4" x 13" x slab thickness
Application dimension
Creates a 2-1/2" deep recess in the slab
Minimum slab thickness
4-1/2"
Intumescent activation
Approx. 375°F (190°C)
Expansion ratio (unrestricted)
1:10
Temperature resistance
Maximum 212°F (100°C)
Color
Red with white PVC legs and coupling
Storage
Store in dry location
Approvals
In progress
Tested in accordance with
•UL 1479
•ASTM E 814
Internationally tested and approved
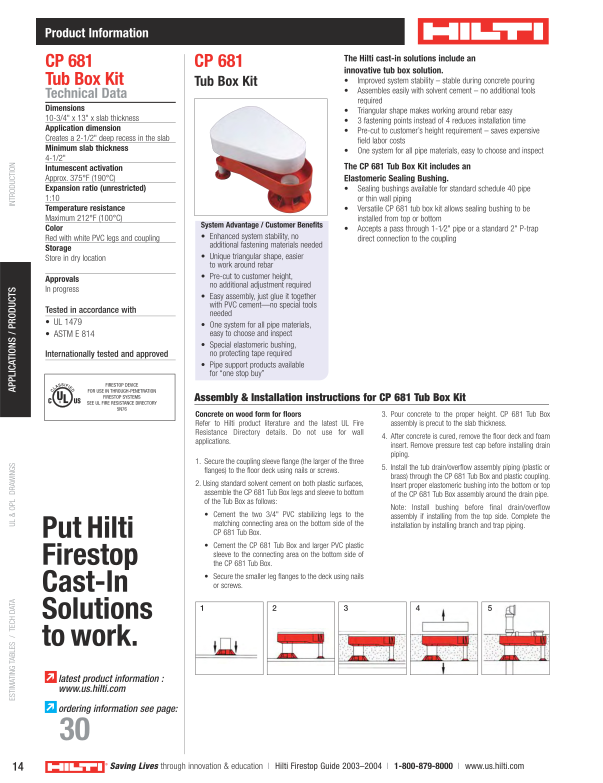
CP 681
Tub Box Kit
Assembly & Installation instructions for CP 681 Tub Box Kit
System Advantage / Customer Benefits
•Enhanced system stability, no
additional fastening materials needed
•Unique triangular shape, easier
to work around rebar
•Pre-cut to customer height,
no additional adjustment required
•Easy assembly, just glue it together
with PVC cement—no special tools
needed
•One system for all pipe materials,
easy to choose and inspect
•Special elastomeric bushing,
no protecting tape required
•Pipe support products available
for “one stop buy”
The Hilti cast-in solutions include an
innovative tub box solution.
•
Improved system stability – stable during concrete pouring
•
Assembles easily with solvent cement – no additional tools
required
•
Triangular shape makes working around rebar easy
•
3 fastening points instead of 4 reduces installation time
•
Pre-cut to customer’s height requirement – saves expensive
field labor costs
•
One system for all pipe materials, easy to choose and inspect
The CP 681 Tub Box Kit includes an
Elastomeric Sealing Bushing.
•
Sealing bushings available for standard schedule 40 pipe
or thin wall piping
•
Versatile CP 681 tub box kit allows sealing bushing to be
installed from top or bottom
•
Accepts a pass through 1-1⁄2" pipe or a standard 2" P-trap
direct connection to the coupling
Concrete on wood form for floors
Refer to Hilti product literature and the latest UL Fire
Resistance Directory details.Do not use for wall
applications.
1.Secure the coupling sleeve flange (the larger of the three
flanges) to the floor deck using nails or screws.
2. Using standard solvent cement on both plastic surfaces,
assemble the CP 681 Tub Box legs and sleeve to bottom
of the Tub Box as follows:
•Cement the two 3/4" PVC stabilizing legs to the
matching connecting area on the bottom side of the
CP 681 Tub Box.
•Cement the CP 681 Tub Box and larger PVC plastic
sleeve to the connecting area on the bottom side of
the CP 681 Tub Box.
•Secure the smaller leg flanges to the deck using nails
or screws.
3.Pour concrete to the proper height.CP 681 Tub Box
assembly is precut to the slab thickness.
4.After concrete is cured, remove the floor deck and foam
insert. Remove pressure test cap before installing drain
piping.
5.Install the tub drain/overflow assembly piping (plastic or
brass) through the CP 681 Tub Box and plastic coupling.
Insert proper elastomeric bushing into the bottom or top
of the CP 681 Tub Box assembly around the drain pipe.
Note:Install bushing before final drain/overflow
assembly if installing from the top side.Complete the
installation by installing branch and trap piping.
1
2
3
4
5
Put Hilti
Firestop
Cast-In
Solutions
to work.
FIRESTOP DEVICE
FOR USE IN THROUGH-PENETRATION
FIRESTOP SYSTEMS
SEE UL FIRE RESISTANCE DIRECTORY
5N76